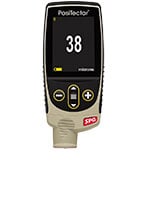
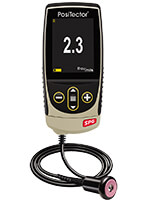
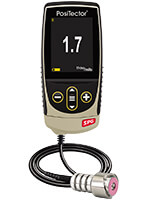
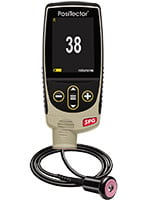
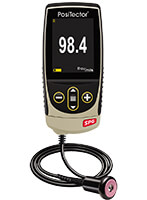
DeFelsko PosiTector SPG

Surface Profile Gages for Blasted Steel, Textured Coatings, and Concrete Profile

Surface Profile Gages use a digital depth micrometer to measure and record peak to valley surface profile heights in preparation for the application of coatings

  • NEW Larger 2.8" impact resistant color touchscreen with redesigned keypad for quick menu navigation
  • NEW Weatherproof, dustproof, and water-resistant - IP65-rated enclosure
  • Alumina wear face and tungsten carbide tip for long life and continuous accuracy - field replaceable
  • PosiTector interchangeable platform - attach any PosiTector probe to a single gage body
  • Fast measurement rate of over 50 readings per minute - for quickly measuring large surfaces
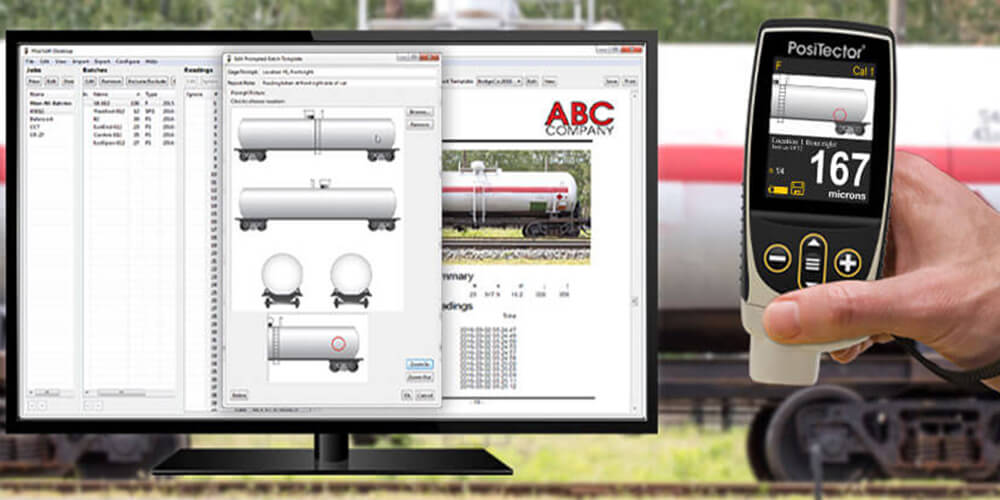
  • USB, WiFi, and Bluetooth connectivity to PosiSoft PC, Mac, and Smartphone software
  • Certificate of Calibration showing traceability to PTB included (Long Form)
  • Conforms to ASTM D4417-B, ASTM D8271 (SPG TS only), AS 3894.5-C (with optional 30° tip),

U.S. Navy NSI 009-32, Navy NAVSEA 009-32, US Navy NAVSEA PPI 63101-000, SSPC PA 17, SANS 5772, and others


line
DeFelsko SPG Standard PosiTector Surface Profile Gages: 5 Models Available
line

DeFelsko PosiTetor SPG 1 DeFelsko PosiTetor SPG S1 DeFelsko PosiTetor SPG OS1 DeFelsko PosiTetor SPG CS1 DeFelsko PosiTetor SPG TS1
DeFelsko SPG 1 PosiTector
Surface Profile Gages
DeFelsko SPG S1 PosiTector
Surface Profile Gages
DeFelsko SPG OS1 PosiTector
Surface Profile Gages ^
DeFelsko SPG CS1 PosiTector
Surface Profile Gages
DeFelsko SPG TS1 PosiTector
Surface Profile Gages
FOR BLASTED STEEL FOR BLASTED STEEL FOR BLASTED STEEL FOR TEXTURE COATING FOR CONCRETE PROFILE
MEASURING RANGE MEASURING RANGE MEASURING RANGE MEASURING RANGE MEASURING RANGE
0 – 500 um
0 – 20 mils
0 – 500 um
0 – 20 mils
0 – 500 um
0 – 20 mils
0 – 1500 um
0 – 60 mils
0 – 6 mm
0 – 250 mils
ACCURACY ACCURACY ACCURACY ACCURACY ACCURACY
± (5 um + 5%)
± (0.2 mil + 5%)
± (5 um + 5%)
± (0.2 mil + 5%)
± (5 um + 5%)
± (0.2 mil + 5%)
± (5 um + 5%)
± (0.2 mil + 5%)
± (25 um + 1%)
± (1 mil + 1%)
TIP TIP TIP TIP TIP
Angle: 60 Degree*
Radius: 50 um (2 mils)
Angle: 60 Degree*
Radius: 50 um (2 mils)
Angle: 60 Degree*
Radius: 50 um (2 mils)
Angle: 60 Degree
Radius: 500 um (20 mils)
Angle: 60 Degree
Radius: 500 um (20 mils)

* 30 degree tips available for conformance to Australian standard AS3894.5-C
^ The PosiTector SPG OS is a surface profile gage ideal for measuring the peak-to-valley surface profile height of flat or convex surfaces with an OD above 3mm (0.125”) such as pipes and tanks.


line
DeFelsko SPG Advanced PosiTector Surface Profile Gages: 5 Models Available
line

DeFelsko PosiTector SPG 3 DeFelsko PosiTector SPG S3 DeFelsko PosiTector SPG S3 DeFelsko PosiTector SPG CS3 DeFelsko PosiTector SPG TS3
DeFelsko SPG 3 PosiTector
Surface Profile Gages
DeFelsko SPG S3 PosiTector
Surface Profile Gages
DeFelsko SPG OS3 PosiTector
Surface Profile Gages ^
DeFelsko SPG CS3 PosiTector
Surface Profile Gages
DeFelsko SPG TS3 PosiTector
Surface Profile Gages
FOR BLASTED STEEL FOR BLASTED STEEL FOR BLASTED STEEL FOR TEXTURE COATING FOR CONCRETE PROFILE
MEASURING RANGE MEASURING RANGE MEASURING RANGE MEASURING RANGE MEASURING RANGE
0 – 500 um
0 – 20 mils
0 – 500 um
0 – 20 mils
0 – 500 um
0 – 20 mils
0 – 1500 um
0 – 60 mils
0 – 6 mm
0 – 250 mils
ACCURACY ACCURACY ACCURACY ACCURACY ACCURACY
± (5 um + 5%)
± (0.2 mil + 5%)
± (5 um + 5%)
± (0.2 mil + 5%)
± (5 um + 5%)
± (0.2 mil + 5%)
± (5 um + 5%)
± (0.2 mil + 5%)
± (25 um + 1%)
± (1 mil + 1%)
TIP TIP TIP TIP TIP
Angle: 60 Degree*
Radius: 50 um (2 mils)
Angle: 60 Degree*
Radius: 50 um (2 mils)
Angle: 60 Degree*
Radius: 50 um (2 mils)
Angle: 60 Degree
Radius: 500 um (20 mils)
Angle: 60 Degree
Radius: 500 um (20 mils)

* 30 degree tips available for conformance to Australian standard AS3894.5-C
^ The PosiTector SPG OS is a surface profile gage ideal for measuring the peak-to-valley surface profile height of flat or convex surfaces with an OD above 3mm (0.125”) such as pipes and tanks.


line
DeFelsko SPG Probe Only PosiTector Surface Profile Gages: 5 Models Available
line

DeFelsko PosiTector PRBSPG DeFelsko PosiTector PRBSPGS DeFelsko PosiTector PRBSPGOS DeFelsko PosiTector PRBSPGCS DeFelsko PosiTector PRBSPGTS
DeFelsko PRBSPG PosiTector
Surface Profile Gages
DeFelsko PRBSPGS PosiTector
Surface Profile Gages
DeFelsko PRBSPGOS PosiTector
Surface Profile Gages^
DeFelsko PRBSPGCS PosiTector
Surface Profile Gages
DeFelsko PRBSPGTS PosiTector
Surface Profile Gages
FOR BLASTED STEEL FOR BLASTED STEEL FOR BLASTED STEEL FOR TEXTURE COATING FOR CONCRETE PROFILE
MEASURING RANGE MEASURING RANGE MEASURING RANGE MEASURING RANGE MEASURING RANGE
0 – 500 um
0 – 20 mils
0 – 500 um
0 – 20 mils
0 – 500 um
0 – 20 mils
0 – 1500 um
0 – 60 mils
0 – 6 mm
0 – 250 mils
ACCURACY ACCURACY ACCURACY ACCURACY ACCURACY
± (5 um + 5%)
± (0.2 mil + 5%)
± (5 um + 5%)
± (0.2 mil + 5%)
± (5 um + 5%)
± (0.2 mil + 5%)
± (5 um + 5%)
± (0.2 mil + 5%)
± (25 um + 1%)
± (1 mil + 1%)
TIP TIP TIP TIP TIP
Angle: 60 Degree*
Radius: 50 um (2 mils)
Angle: 60 Degree*
Radius: 50 um (2 mils)
Angle: 60 Degree*
Radius: 50 um (2 mils)
Angle: 60 Degree
Radius: 500 um (20 mils)
Angle: 60 Degree
Radius: 500 um (20 mils)

* 30 degree tips available for conformance to Australian standard AS3894.5-C
^ The PosiTector SPG OS is a surface profile gage ideal for measuring the peak-to-valley surface profile height of flat or convex surfaces with an OD above 3mm (0.125”) such as pipes and tanks.


lineDeFelsko PosiTector Gage Bodies: Feature Comparison Chartline

Feature Comparison Chart DeFelsko Positector 6000 Standard Body
Standard
DeFelsko Positector 6000 Advanced Body
Advanced
NEW Larger 2.8" impact resistant color touchscreen with redesigned keypad for quick menu navigation
NEW On-gage help explains menu items at the touch of a button
NEW Weatherproof, dustproof, and water-resistant - IP65-rated enclosure
NEW Ergonomic design with durable rubberized grip
NEW Auto rotating display with Flip Lock
NEW Screen Capture - save 100 screen images for record keeping and review
NEW Instant-on feature quickly powers up the gage if recently powered down
NEW Up to 30% longer battery life
Reading Storage Capacity 1,000 per probe 250,000 in up to 1,000 batches
SmartBatch™ allows entry of user-defined parameters and criteria to for quick statistical analysis comply with standards such as ASTM D4417 and SSPC PA-17 ---
Live graphing of measurement data ---
NEW Touchscreen keyboard for quickly renaming batches, adding notes, and more ---
WiFi technology wirelessly synchronizes with PosiSoft.net and downloads software updates ---
Bluetooth 4.0 Technology for data transfer to a mobile device running the PosiTector App or optional portable printer. BLE API available for integration into third-party software ---
Integrate with third-party software, drones, ROVs, PLCs, and robotic devices using several industry-standard communication protocols ---

For use with the: DeFelsko PosiTector 6000DeFelsko PosiTector 200DeFelsko PosiTector SPGDeFelsko PosiTector RTR HDeFelsko PosiTector RTR 3DDeFelsko PosiTector DPMDeFelsko PosiTector IRTDeFelsko PosiTector SST , DeFelsko PosiTector UTGDeFelsko PosiTector SHDDeFelsko PosiTector BHI


line
DeFelsko PosiTector SPG Surface Profile Gages Videos
line


lineDeFelsko Accessoriesline


Accessories for DeFelsko Inspection Instruments - Online Catalog


line
PosiSoft Suite of Software
line

Four FREE and unique ways to view and report your PosiTector and PosiTest data. Learn More

  • PosiSoft Desktop
  • PosiSoft.net
  • PosiTector App
  • PosiSoft USB

F.A.Q.

Is the spring pressure for the PosiTector SPG TS lower than the SPG CS?

The spring pressure is slightly greater than the SPG TS to allow adequate seating of the tip in the profile. Keep in mind that no standards exist for such a method, so we designed the pressure based on our internal tests.

Is the PosiTector SPG TS traceable to PTB or NIST?

All PosiTector SPG probes including the SPG TS are traceable to PTB

Do your instruments require any formal training for use? Do you offer ‘demo’ models?

No. Our instruments are designed for simple operation, feature easy-to-use menus, both full and quick instruction manuals, and helpful videos. In lieu of demonstration models, we provide unlimited technical support via telephone and/or email, and a limited 30-day money back guarantee

Is the PosiTector SPG calibrated at the factory?

The PosiTector SHD arrives fully calibrated and ready to measure. A Long-Form Certificate of Calibration traceable to NIST or PTB is included, which documents actual readings taken by your instrument at our calibration laboratory on standards traceable to a national metrology institute. Beware of ‘Certificates’ or ‘Certificates of Conformance’ offered by competitors. These typically do not include actual instrument readings, and are often insufficient to meet common quality requirements.Gage accuracy and correct operation can be verified using the included metal shim and glass zero plate.

Can I measure curved surfaces with the PosiTector SPG?

To measure accurately, the PosiTector SPG’s probe foot must contact the surface over its entire area. On tightly curved surfaces, the edges of the probe do not sit on the surface, skewing the readings.Our PosiTector SPG instruments conform to Method B as described by ASTM D 4417 "Standard Test Methods for Field Measurement of Surface Profile of Blast Cleaned Steel". The entirety of ASTM D 4417 specifically references flat, blasted steel surfaces. As such, any depth micrometer instrument used to measure the surface profile of a curved, blasted steel surface does not conform to ASTM D 4417.Replica tape is ideal for recording the blast profile of curved surfaces, and DeFelsko recommends the PosiTector RTR Replica Tape Reader instrument as a reliable measurement alternative.

Can the PosiTector SPG be used on non-metallic substrates?

Yes! While primarily used to measure blasted steel, the PosiTector SPG can be used for many applications. The PosiTector SPG TS and PosiTector SPG CS also feature an extended range and larger radius probe tip to suit a wide range of applications:

  1. The PosiTector SPG CS will quickly and accurately measure the surface profile of textured coatings.
  2. The PosiTector SPG TS will quickly and accurately measure the surface profile of concrete.

Why are there 30? and 60? tips for the PosiTector SPG?

The PosiTector SPG uses a durable tungsten carbide tip for long life and continuous accuracy. If required, SPG probe tips can be replaced by the gage operator

  • The 60° tip complies with most test standards including ASTM D 4417 B.
  • 30° tips are available for conformance to Australian standard AS 3994.5-C.

Can the PosiTector SPG be moved over the surface to provide a ‘scan’?

No. The PosiTector SPG is a depth-micrometer instrument which quickly and accurately measures and records peak-to-valley surface profile heights on a blasted steel surface.Like other instruments of this type, the PosiTector SPG is not dragged across a blasted surface: the gage operator takes an individual reading in one location on a surface, lifts and places the gage on another location on the surface for another individual reading, and so on.

Does the PosiTector SPG measure pit depth?

No. Pit gages are a general category of instruments used to measure pits and other surface variations. The PosiTector SPG is specifically designed to measure and record peak-to-valley surface profile heights on a blasted steel surface

Should I purchase the PosiTector RTR or PosiTector SPG for my application?

Both instruments conform to ASTM D 4417 "Standard Test Methods for Field Measurement of Surface Profile of Blast Cleaned Steel".The PosiTector SPG conforms to Method B of ASTM D 4417. The PosiTector SPG measures quickly, and has no per-test cost. It keeps a digital record of each measurement, is less operator dependent, as no burnishing of replica tape is required. It also has a greater range than replica tape.The PosiTector RTR conforms to Method C of ASTM D 4417. It is used together with Testex Replica tape, a widely used and respected method to measure surface profile. It has the ability to measure on curved surfaces, and gives the user the option to retain the replica tape; a physical replica of the tested surface.

How often should the PosiTector probe be recalibrated?

PosiTector probes include a Certificate of Calibration with no expiry or end date. They have no shelf life, therefore the length of time in the field is not a good indicator for recalibration intervals. Many organizations with quality programs and recertification programs require annual recalibrations, and this is a good starting point for most users. DeFelsko recommends that customers establish calibration intervals based upon their own experience and work environment. Based on our product knowledge, data and customer feedback, a one year calibration interval from the date the instrument was placed in service is a good starting point

Why does the finger grip sleeve on the PosiTector SPG OS feel loose?

The PosiTector SPG OS is designed with a self-leveling probe foot to ensure perpendicularity to the part being measured. The finger grip sleeve needs to have a loose fit in order for self-leveling to work.

What is the benefit of the optional Large V-groove Adaptor?

The Large V-groove Adaptor offers enhanced stability on 30 – 45 cm (12 – 18") OD pipes and helps with proper positioning and measuring technique. The adaptor should not be used on pipes greater than 46 cm (18”).

Can I compare readings from a PosiTector SPG OS with readings from a PosiTector SPG or SPG S?

On flat surfaces, the PosiTector SPG, SPG S, and SPG OS probes will measure similarly. However, measurements taken by the PosiTector SPG OS (or any depth micrometer surface profile instrument) on rounded surfaces should only be compared with measurements taken on surfaces with a similar radius. On flat surfaces, the probe foot contacts the substrate over its entire area, while on curved surfaces the probe foot contacts an increasingly smaller area as the radius decreases. This may cause a slight decrease in the reported peak-to-valley surface profile height, since the probe foot sits on fewer peaks as the contact area decreases.